Docker Hub: indlovucloud/reclaim-aws-nukeui:latest
Terraform Registry: King-Zingelwayo/reclaim-nukeui-ecs/aws
Issues: https://github.com/King-Zingelwayo/reclaim-nukeui
Reclaim — Web UI for aws-nuke
A self-hosted web control plane for ekristen/aws-nuke — the tool that removes all resources from an AWS account.
Reclaim wraps NukeUI and aws-nuke in a browser-based UI so teams can build, schedule, and monitor nuke runs without touching the CLI. It ships as a single static binary with the aws-nuke binary embedded inside it — zero external runtime dependencies beyond AWS API access.
What it does
- Config builder — drag-and-drop resource types, define filter rules (exact, glob, regex, contains, dateOlderThan), manage presets and per-account overrides, preview the generated YAML before saving.
- Run management — trigger dry-run or live nuke runs, stream output in real time over WebSocket, inspect per-resource status (would-remove, filtered, removed, failed).
- Scheduler — cron-based scheduling with enable/disable toggle per config.
- Stats dashboard — timeline, by-type breakdown, and summary counters across all runs.
- Resource scanner — scan an account and build a config from the live inventory.
- Multi-account — assumes IAM roles in target accounts via
sts:AssumeRole; the controller account never needs long-lived credentials for targets.
Tech stack
- Backend: Go 1.24, chi HTTP router, gorilla/websocket, robfig/cron v3, modernc.org/sqlite (pure-Go SQLite, no CGO), golang-migrate
- Frontend: Vanilla JS ES modules, no build step, served as static files embedded in the binary
- Database: SQLite at
/data/nukeui.db— persisted via S3 Files filesystem on ECS or a named Docker volume locally - Embedded binary: aws-nuke v3 (ekristen fork), UPX-compressed at image build time
Local Development
Prerequisites
- Docker + Docker Compose
- AWS credentials configured locally (see below)
Set up AWS credentials
The container reads your AWS credentials from ~/.aws/ on the host, mounted read-only. No credentials are baked into the image.
Option 1 — AWS CLI (recommended)
aws configure
# Prompts for Access Key ID, Secret Access Key, region, output format.
# Writes to ~/.aws/credentials and ~/.aws/config automatically.
Option 2 — Manual files
# ~/.aws/credentials
[default]
aws_access_key_id     = AKIAIOSFODNN7EXAMPLE
aws_secret_access_key = wJalrXUtnFEMI/K7MDENG/bPxRfiCYEXAMPLEKEY

# ~/.aws/config
[default]
region = eu-west-1
output = json
Option 3 — Named profile
aws configure --profile myprofile

# Then set in docker-compose.yml environment:
# AWS_PROFILE: myprofilests:AssumeRole on any target account roles, plus read access to the controller account (EC2, IAM, etc.) for the resource scanner.
The docker-compose.yml mounts your credentials directory read-only into the container:
volumes:
  - ${HOME}/.aws:/home/nonroot/.aws:ro
Run with Docker Compose
docker compose up -dThe app is available at http://localhost:8081. Data is persisted in a named Docker volume (reclaim-data) mounted at /data.
services:
  reclaim:
    image: indlovucloud/reclaim-aws-nukeui:latest
    ports:
      - "8081:8080"
    volumes:
      - reclaim-data:/data
      - ${HOME}/.aws:/home/nonroot/.aws:ro
    environment:
      NUKEUI_LOG_LEVEL: debug
      AWS_REGION: eu-west-1
      AWS_SDK_LOAD_CONFIG: "1"
      AWS_SHARED_CREDENTIALS_FILE: /home/nonroot/.aws/credentials
      AWS_CONFIG_FILE: /home/nonroot/.aws/config

volumes:
  reclaim-data:
App Walkthrough
This section uses the app screenshots to show the main Reclaim workflow from the dashboard through config creation, run management, scheduling, and resource scanning.
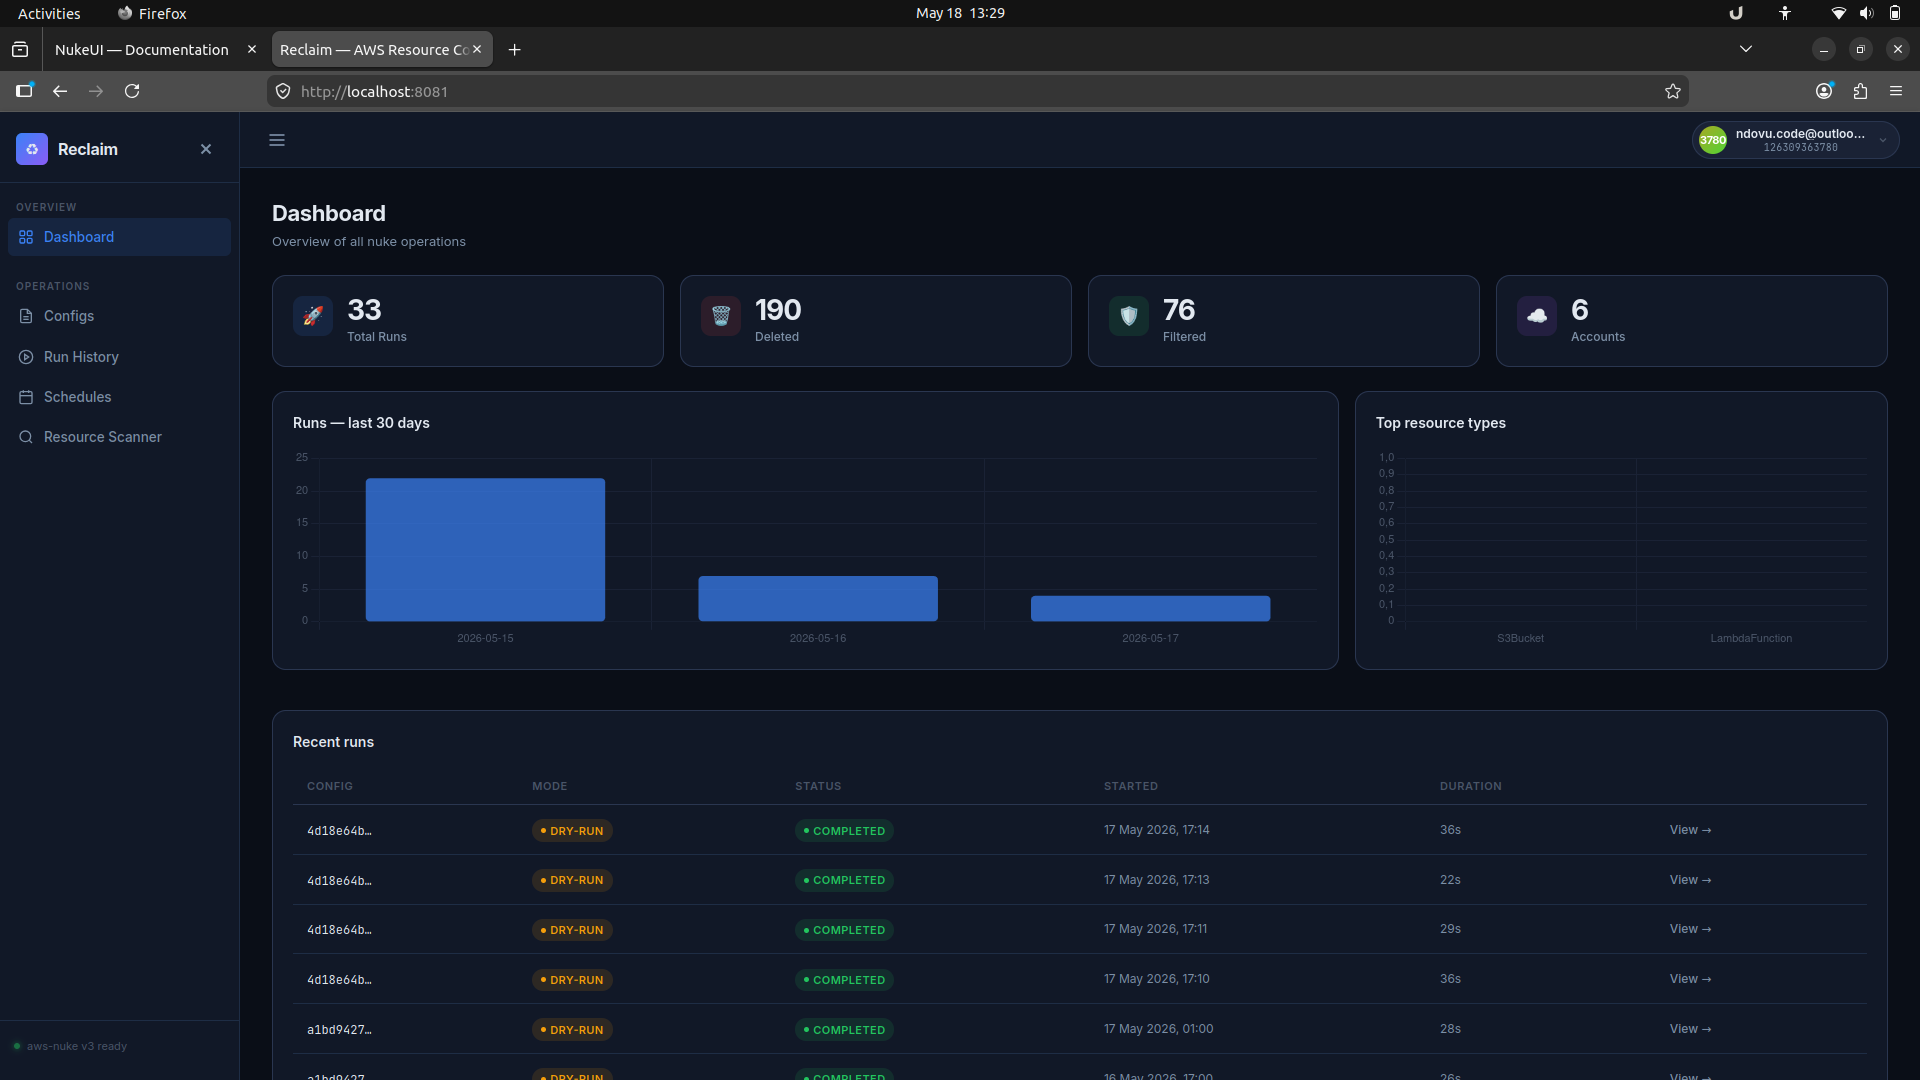
1. Dashboard
The dashboard is the first page after login. It shows overall totals, the most recent runs, and a quick view of top resource types.
2. Explore configurations
The Configs screen lists saved configurations and lets you edit them, start a dry run, or launch a live run.
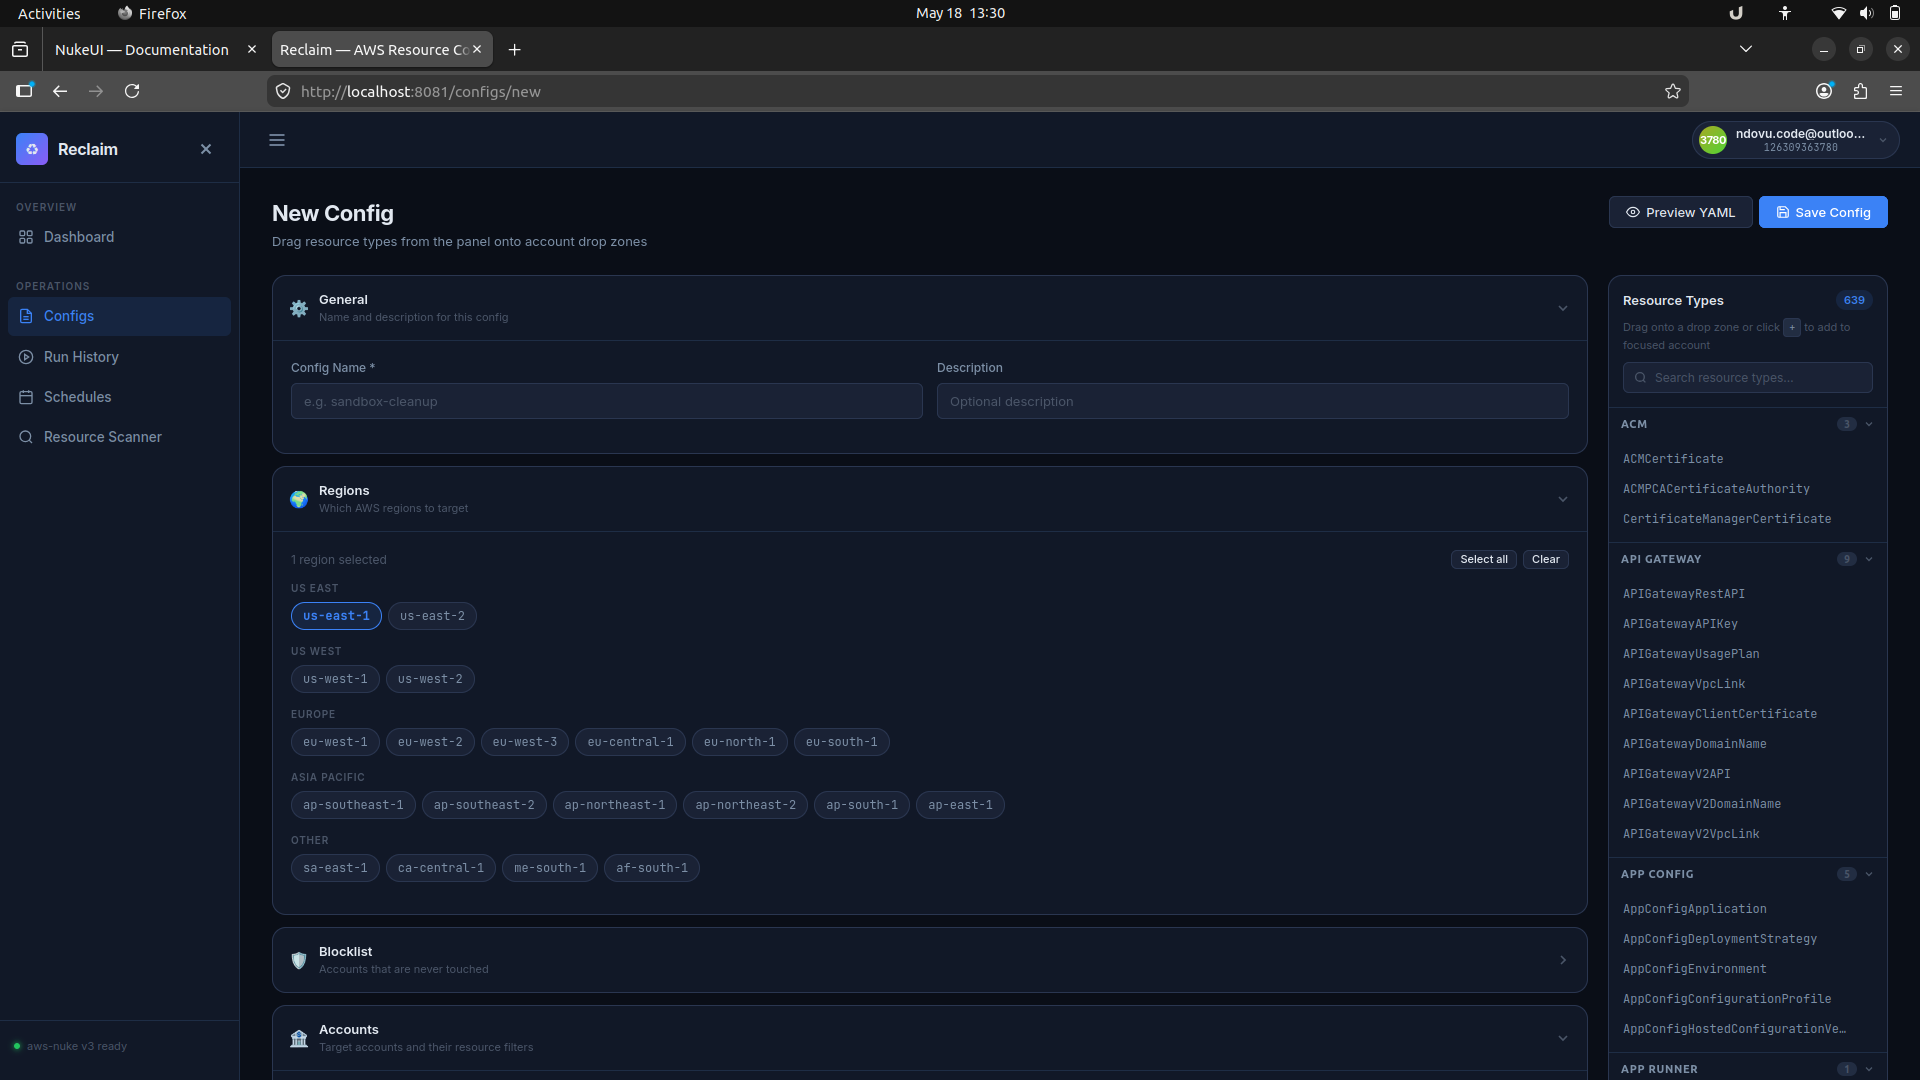
3. Build a new config
The config builder gives you a form to name the config, select AWS regions, add account filters, and choose resource types from the side panel.
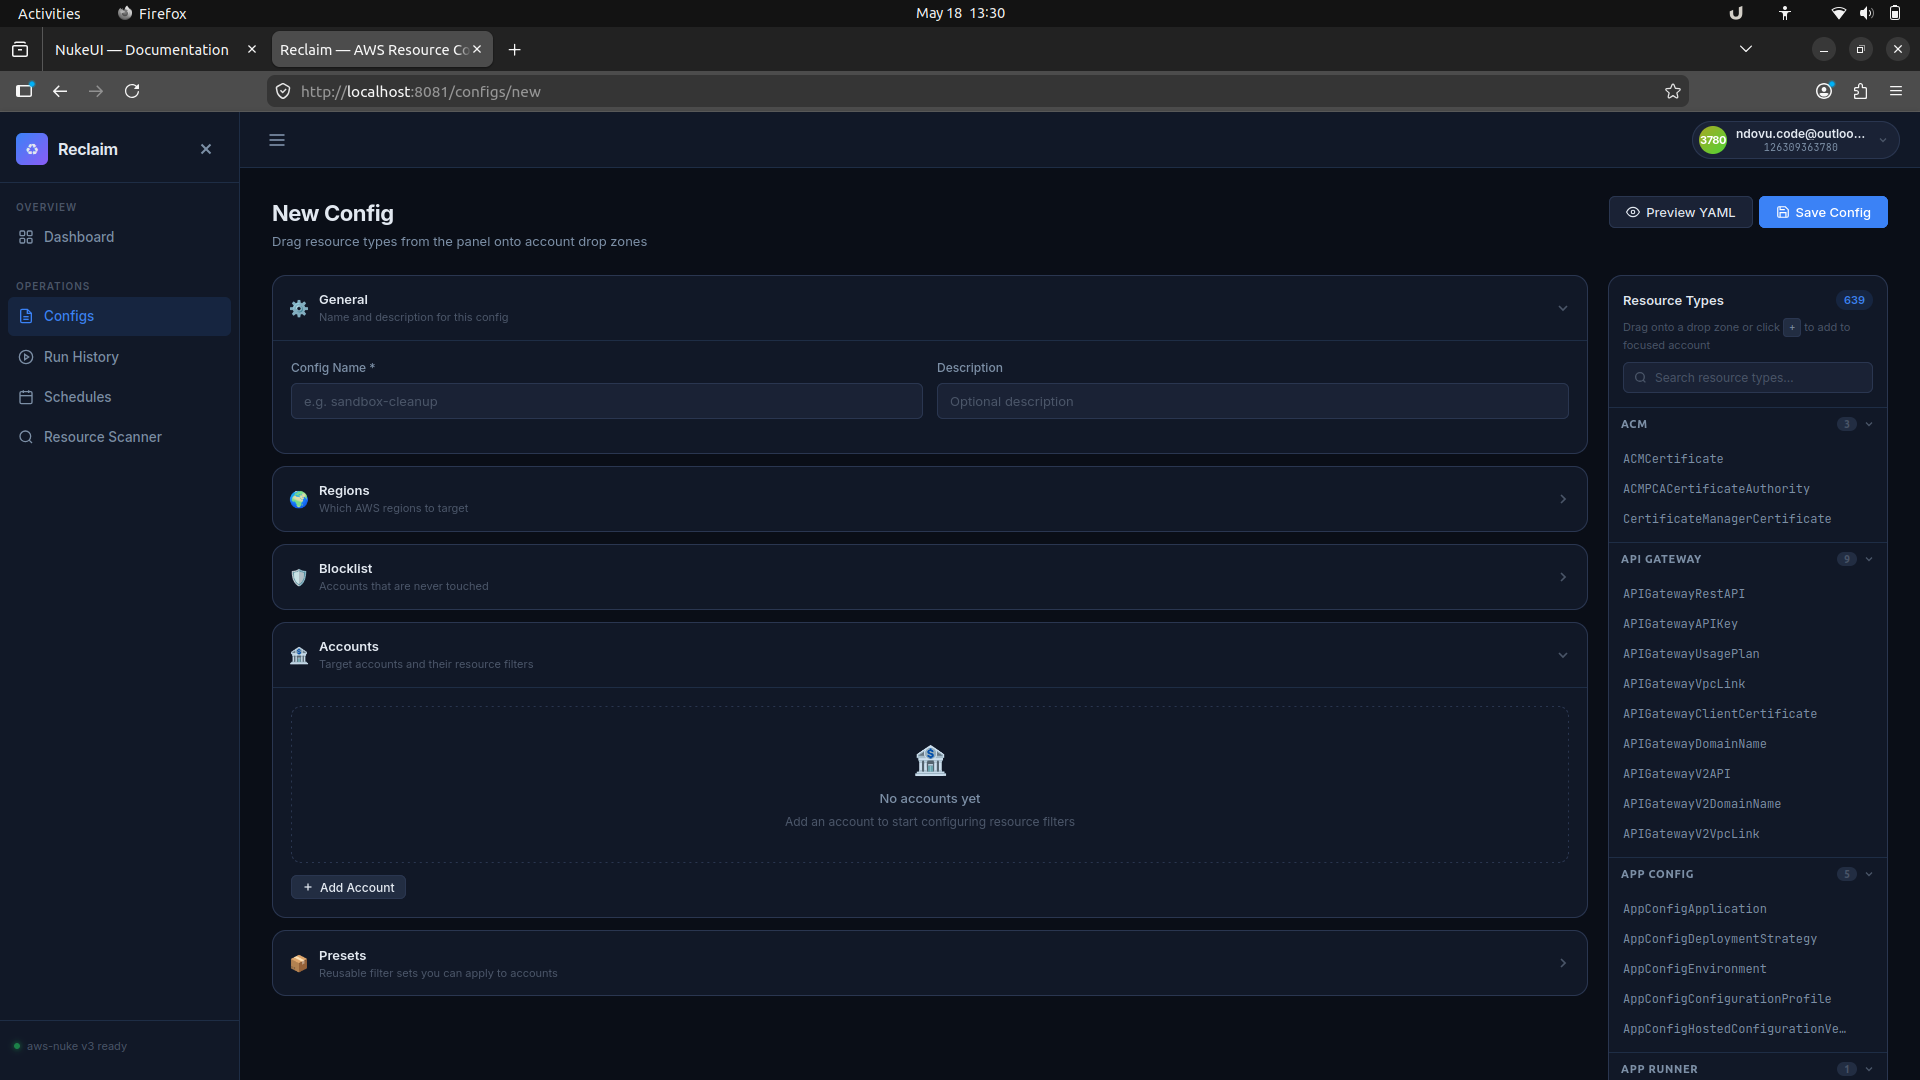
Use the account and blocklist panels to mark accounts that should be protected or targeted. The builder supports per-account filters and reusable presets.

4. Review run history
The Run History page shows every past run with its mode, status, trigger type, and duration. You can open any run to inspect the output.
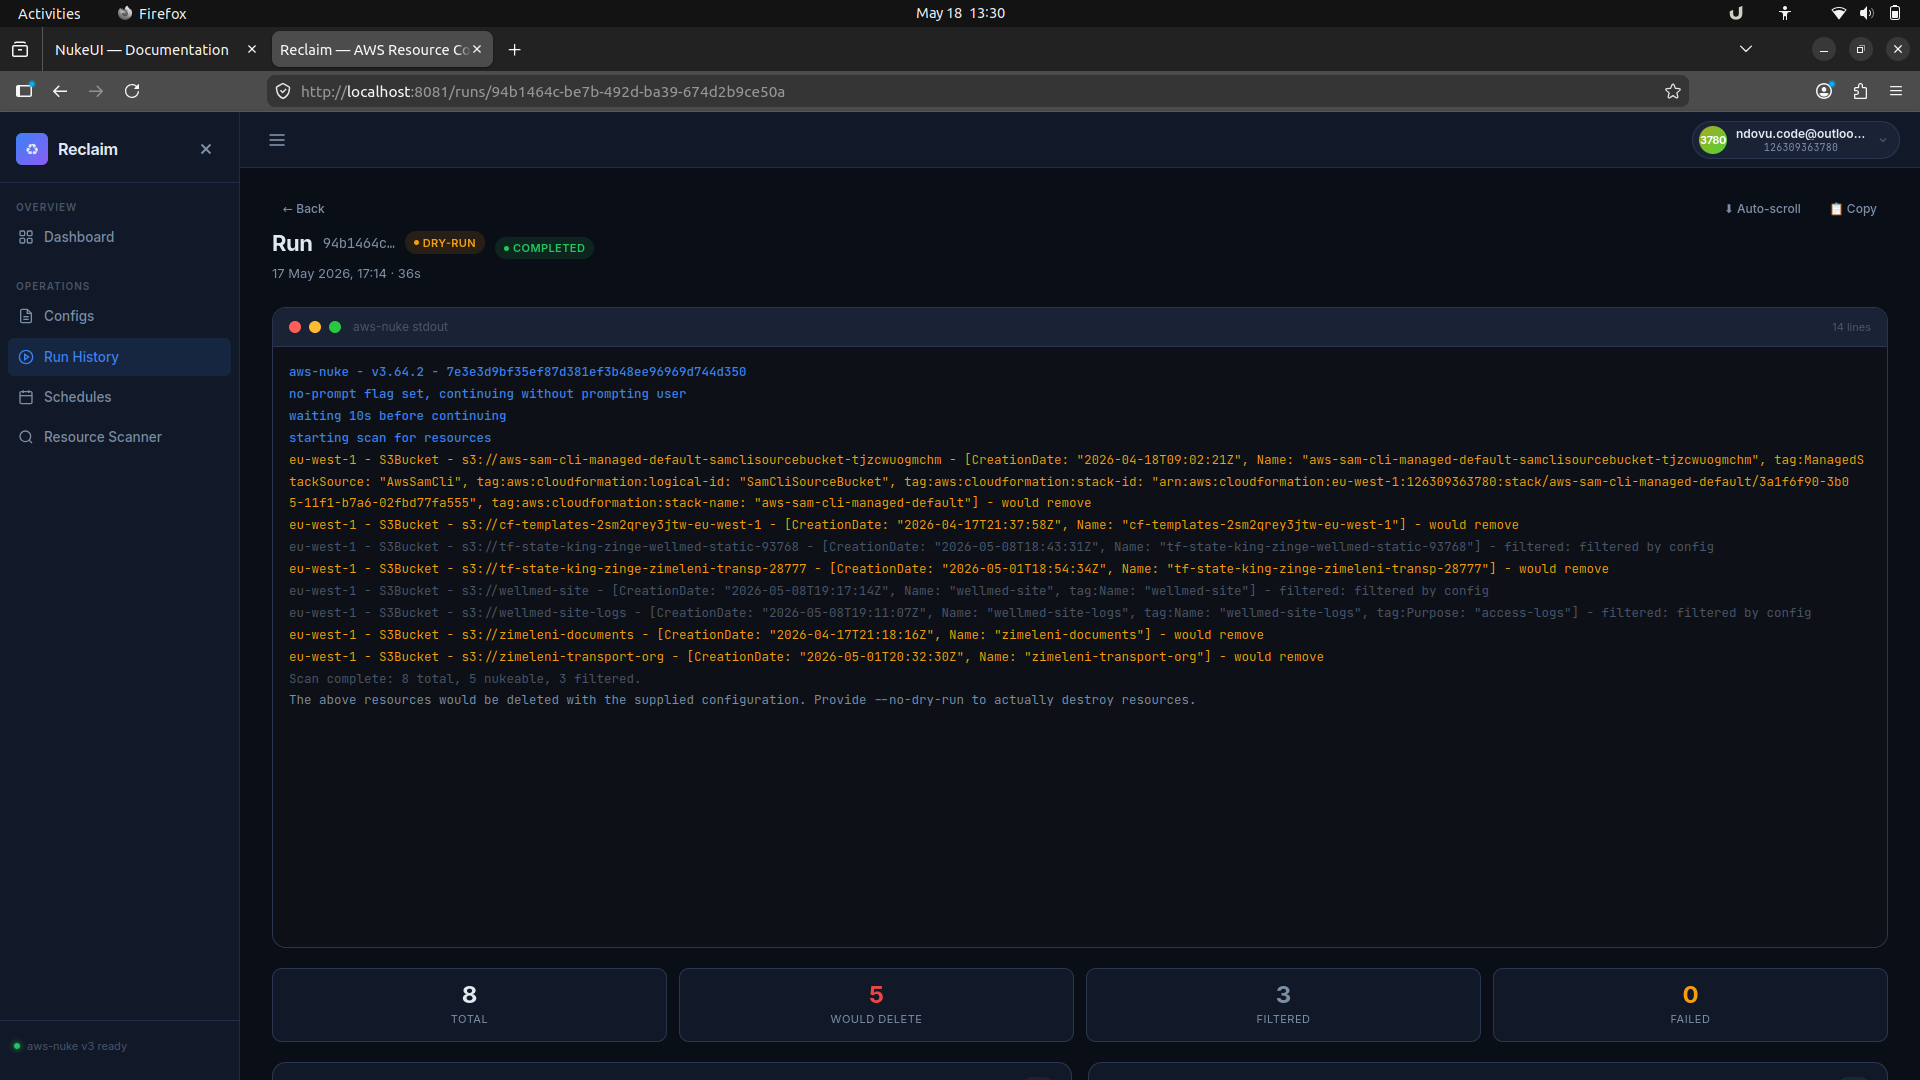
5. Inspect run output
Each run detail page streams aws-nuke output in real time. This view highlights what would be deleted in a dry run and shows which resources were filtered or removed.
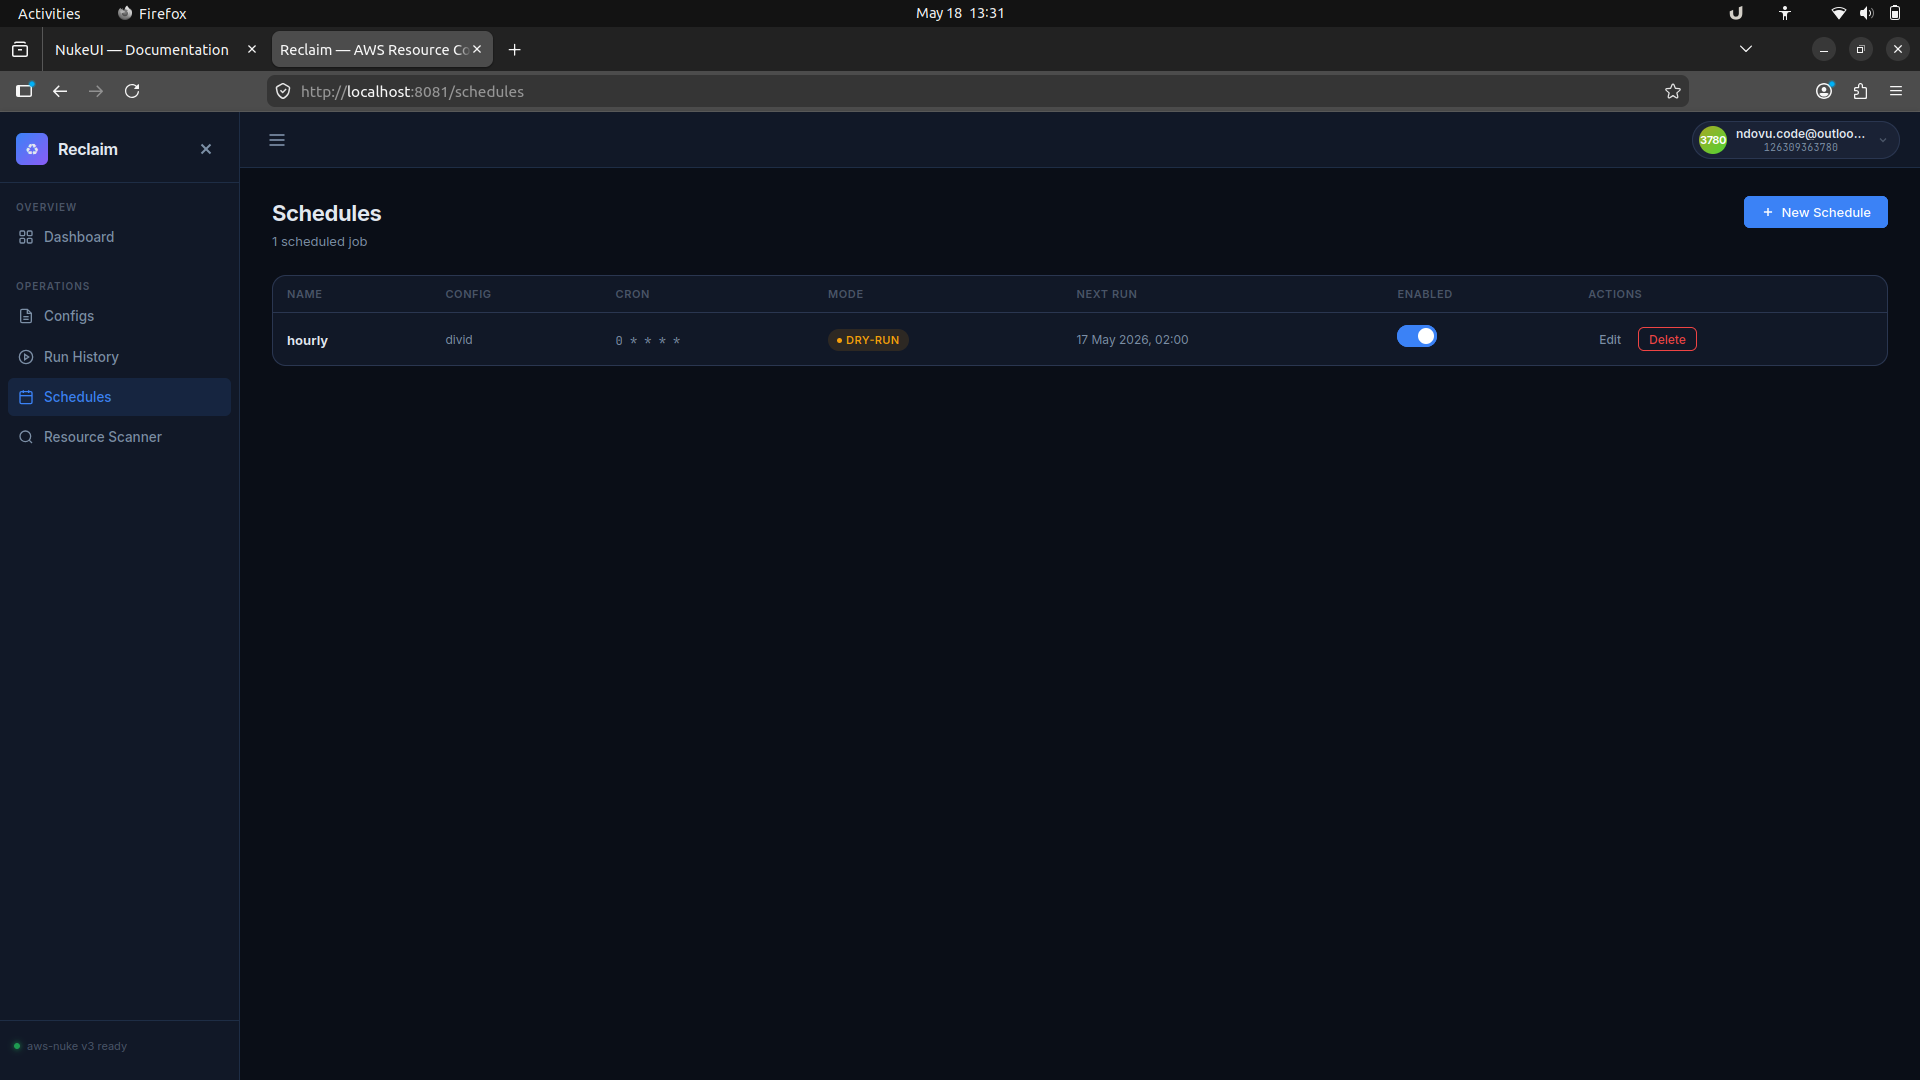
6. Schedule recurring checks
The Schedules section lets you create cron-based jobs for any saved config, choose dry-run or live mode, and enable or disable schedules with a single toggle.
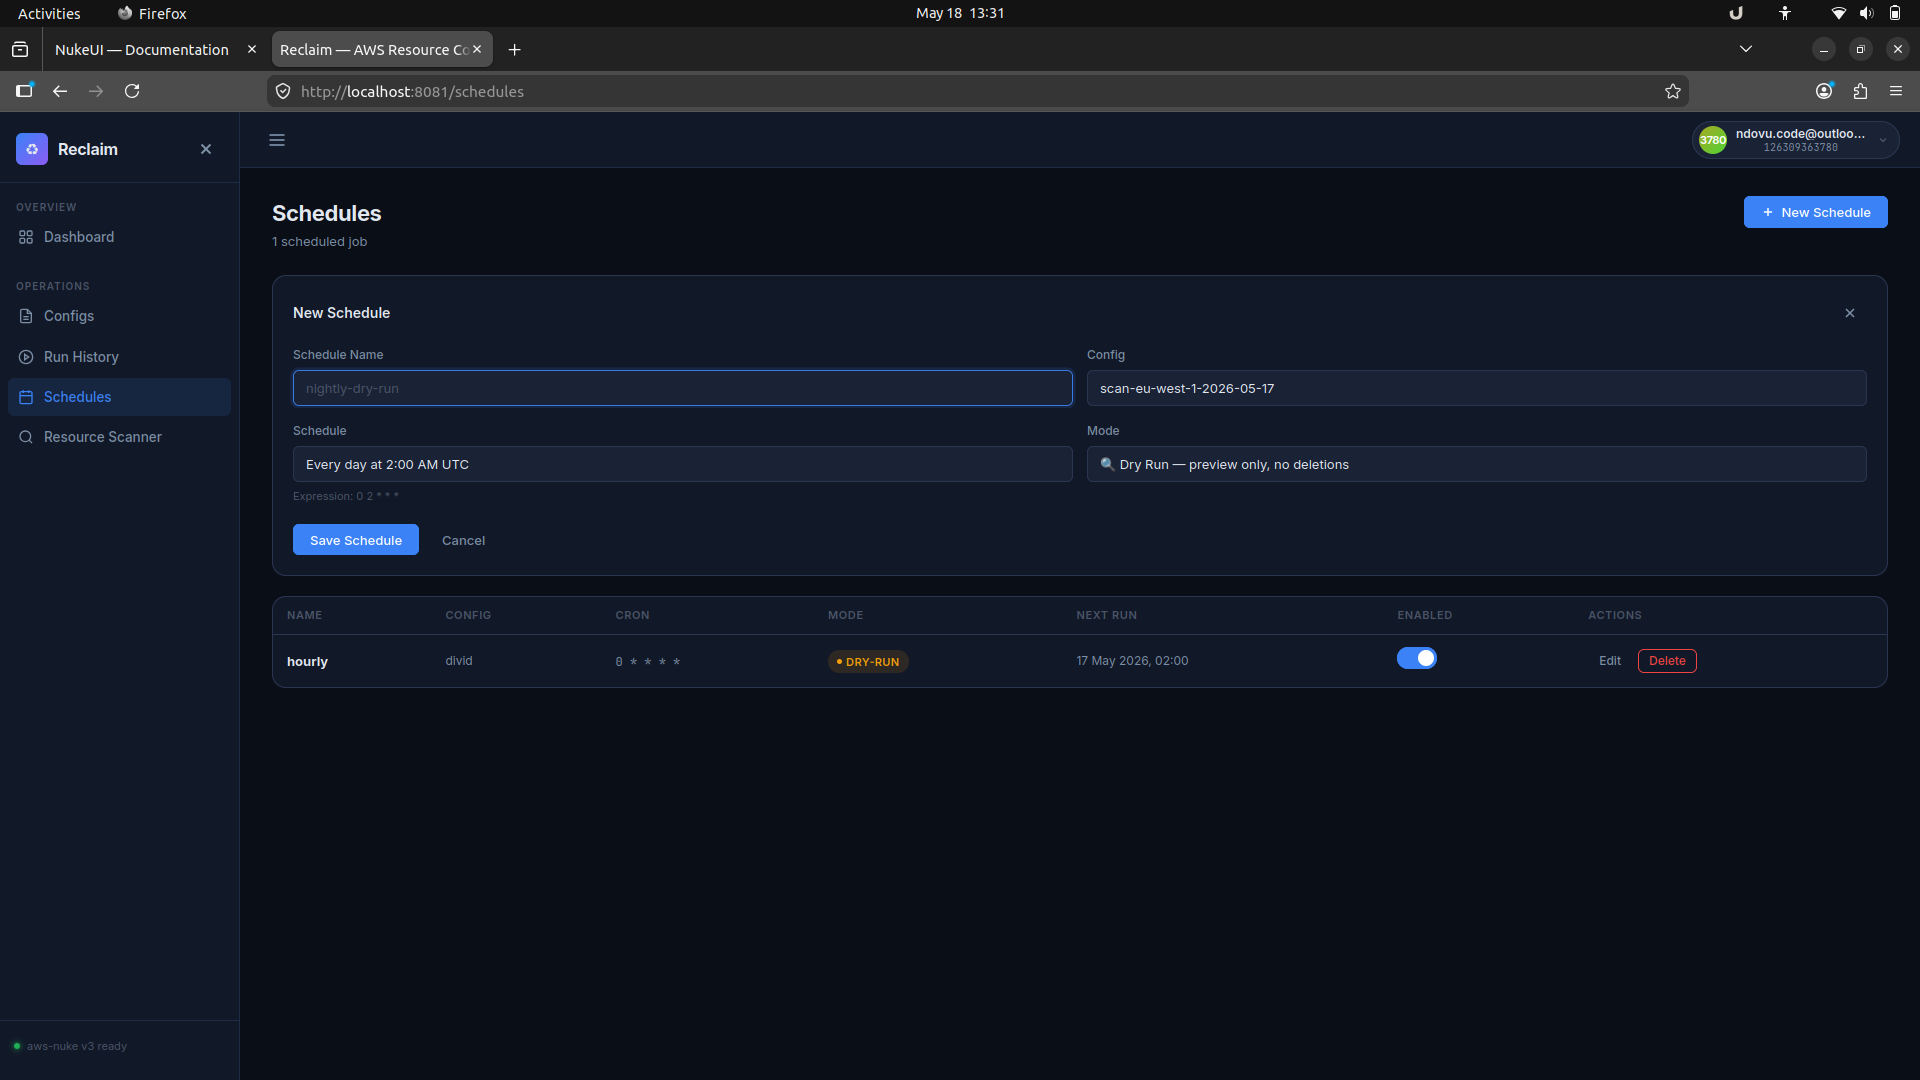
When you create a new schedule, Reclaim shows a friendly expression preview and lets you save the cron job quickly.
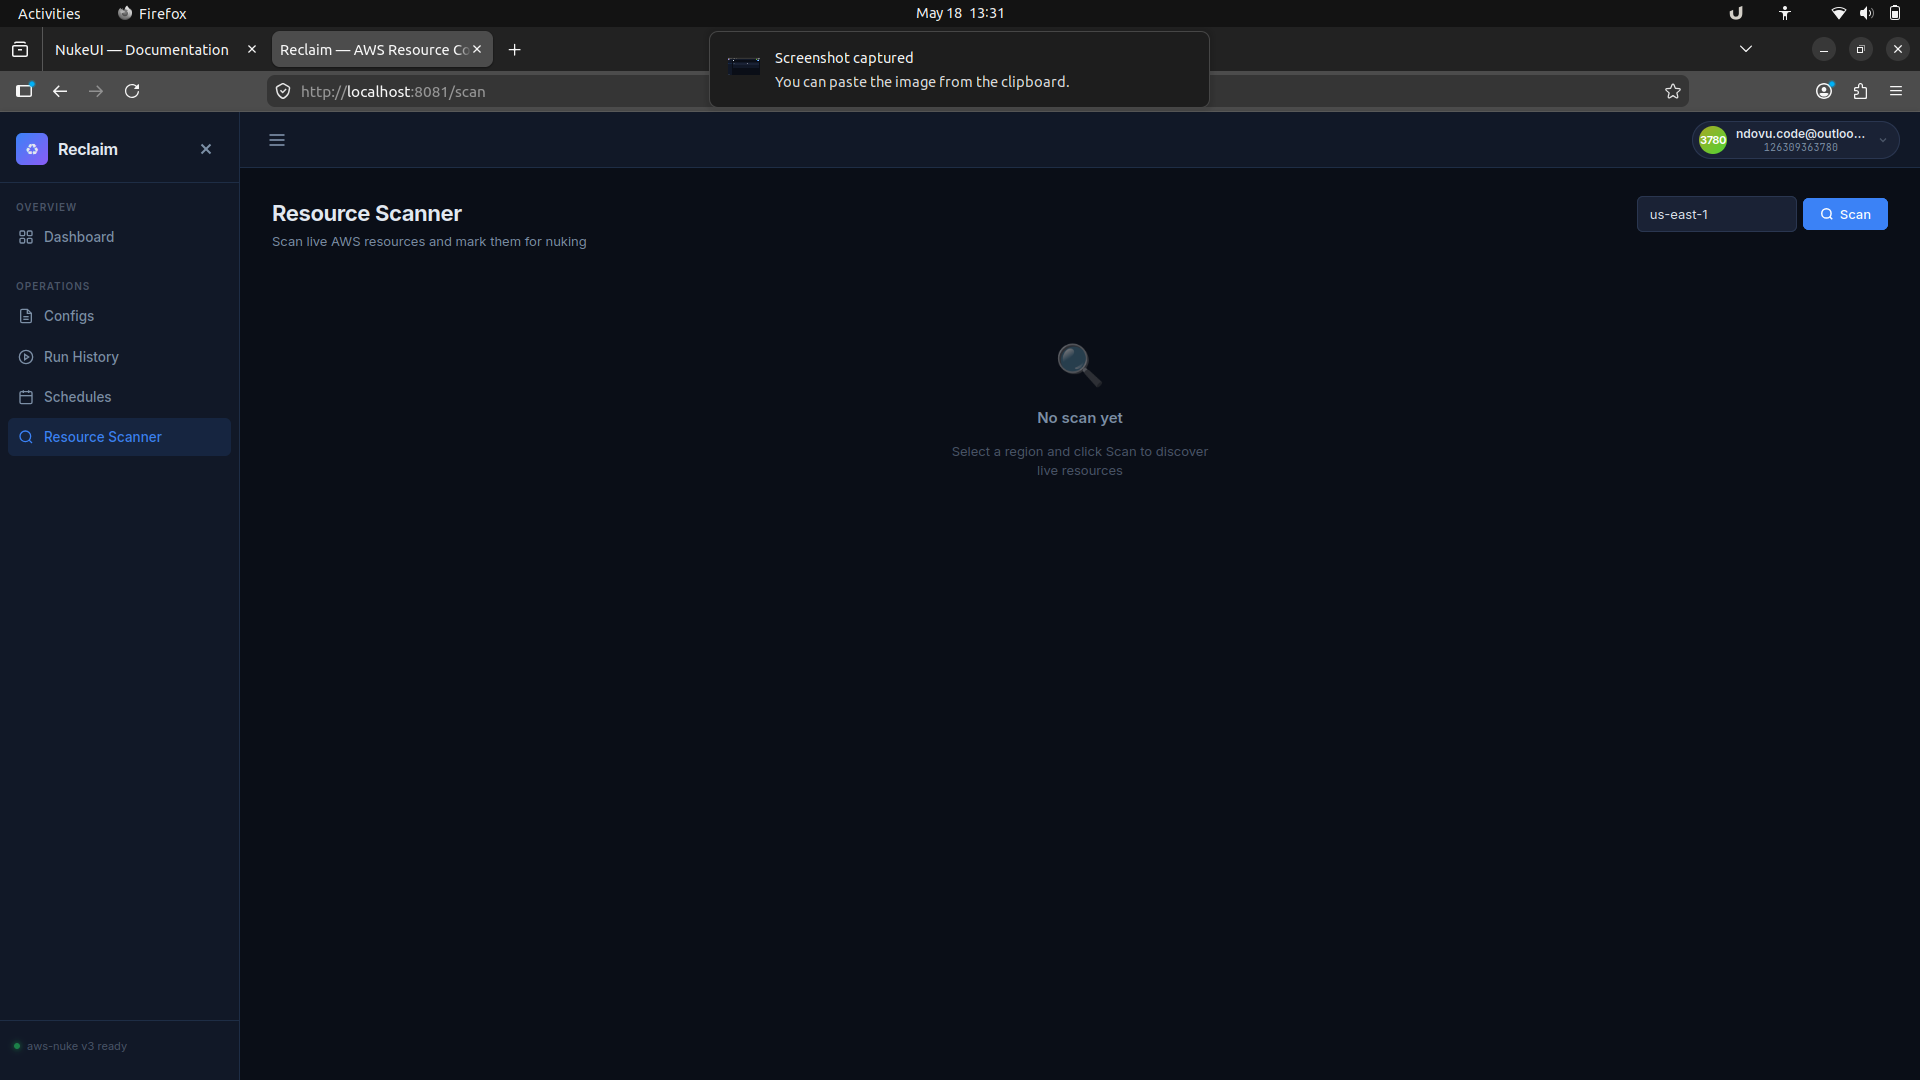
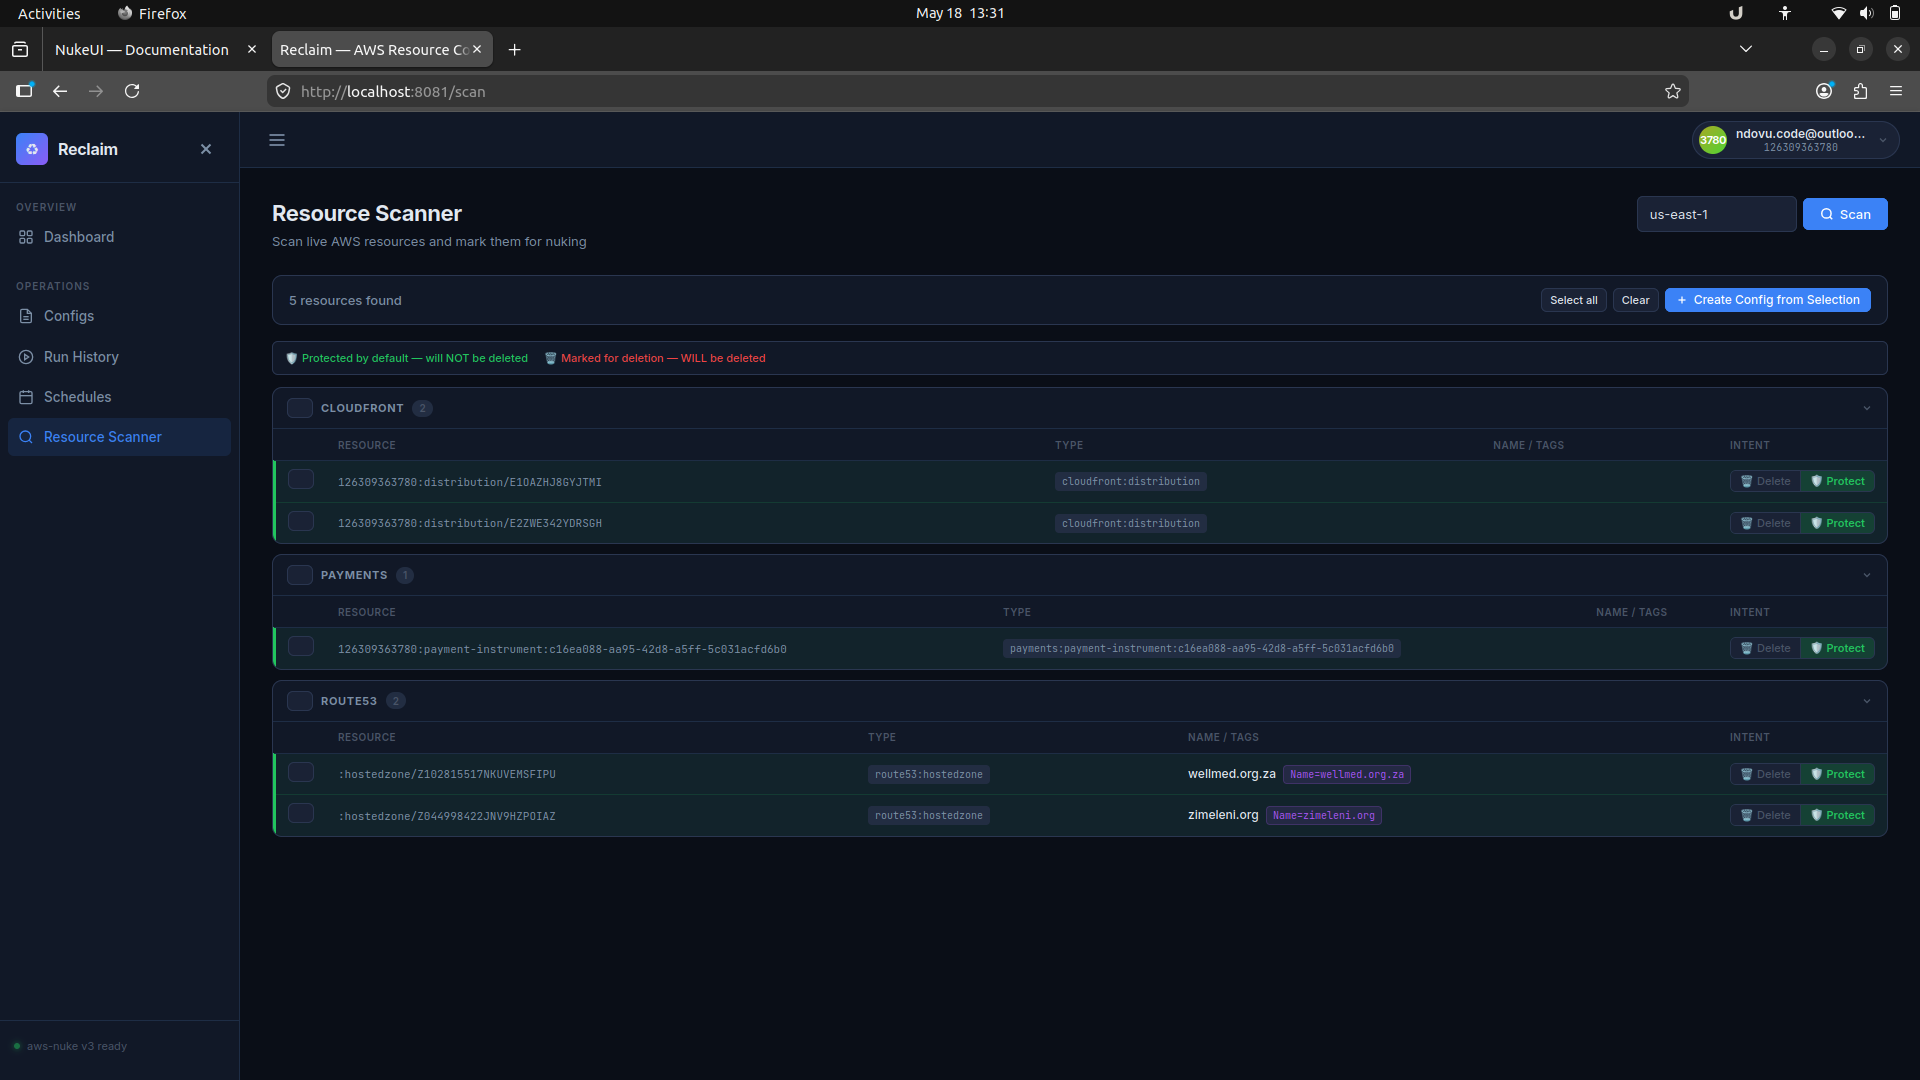
7. Scan live AWS resources
The Resource Scanner page discovers live resources in a selected region and lets you mark them for deletion or protection before generating a config.
Docker Image Architecture
The image is built using a multi-stage Dockerfile that keeps the final image at ~40 MB despite embedding the aws-nuke binary (275 MB+ uncompressed).
| Stage | Purpose |
|---|---|
| version-resolver | Fetches the latest aws-nuke release tag from the GitHub API. |
| nuke-downloader | Downloads the aws-nuke binary for the target arch and compresses it with UPX (LZMA) — reducing it from ~275 MB to ~33 MB (~88% reduction). |
| builder | Compiles the Go application with the compressed aws-nuke binary and all frontend assets embedded inside it. |
| runtime | Minimal Alpine image. Only the compiled binary is copied in. Runs as a non-root user. |
UPX compression: UPX wraps the aws-nuke ELF binary in a self-extracting stub. The kernel decompresses it into memory at exec time — transparent to the application. The --lzma algorithm achieves the highest compression ratio; --best maximises compression effort. Because the Go embed package stores files verbatim, compressing before embedding means the final binary carries a ~33 MB payload instead of ~275 MB.
| Layer | Size |
|---|---|
| Alpine base + runtime deps | ~3 MB |
| Reclaim binary (Go app + embedded aws-nuke + frontend) | ~37 MB |
| Total | ~40 MB |
Self-Hosting on AWS ECS
The infra/modules/reclaim-ecs Terraform module provisions a complete ECS Fargate deployment. It requires Terraform >= 1.5 and the AWS provider >= 6.45.
registry.terraform.io/King-Zingelwayo/reclaim-nukeui-ecs/aws.
For the published module, include version = "1.0.0".
Module usage example
module "reclaim" {
  source = "King-Zingelwayo/reclaim-nukeui-ecs/aws"
  version = "1.0.0"

  name = "reclaim"

  vpc_id         = module.vpc.vpc_id
  subnet_ids     = module.vpc.private_subnet_ids
  alb_subnet_ids = module.vpc.public_subnet_ids

  desired_count   = 1
  create_alb      = true
  certificate_arn = "arn:aws:acm:eu-west-1:123456789012:certificate/abc-123"
  enable_s3files  = true

  allowed_cidr_blocks   = ["10.0.0.0/8"]
  auth_token_secret_arn = "arn:aws:secretsmanager:eu-west-1:123456789012:secret/nukeui-token"

  target_account_role_arns = [
    "arn:aws:iam::111111111111:role/NukeTargetRole",
    "arn:aws:iam::222222222222:role/NukeTargetRole",
  ]

  task_definition = {
    image      = "indlovucloud/reclaim-aws-nukeui:latest"
    # Replace with your container registry URL
    cpu        = 512
    memory     = 1024
    log_level  = "info"
    aws_region = "eu-west-1"
  }

  tags = { Environment = "prod" }
}
Input variables
| Variable | Type | Default | Description |
|---|---|---|---|
name | string | "reclaim" | Name prefix applied to all created resources. |
vpc_id | string | required | VPC to deploy into. |
subnet_ids | list(string) | required | Private subnet IDs for ECS tasks and S3 Files mount targets. |
assign_public_ip | bool | false | Assign a public IP to the Fargate task. Keep false when using private subnets + NAT. |
allowed_cidr_blocks | list(string) | ["0.0.0.0/0"] | CIDR blocks allowed to reach the UI via the ALB. Restrict to your office/VPN CIDR in production. |
cluster_arn | string | null | Existing ECS cluster ARN. If null, a new cluster is created with Container Insights enabled. |
desired_count | number | 1 | Number of task replicas. SQLite is single-writer; keep at 1. |
task_definition.image | string | required | Container image URI. |
task_definition.cpu | number | 512 | Fargate CPU units (256, 512, 1024, 2048, 4096). |
task_definition.memory | number | 1024 | Fargate memory in MiB. |
task_definition.container_port | number | 8080 | Port the container listens on. |
task_definition.log_level | string | "info" | Application log level. |
task_definition.aws_region | string | current region | Injected as AWS_DEFAULT_REGION. |
task_definition.db_path | string | "/data/reclaim.db" | SQLite file path inside the container. |
task_definition.environment | list(object) | [] | Additional environment variables merged with the base set. |
task_definition.secrets | list(object) | [] | Additional Secrets Manager / SSM references. |
task_definition.extra_containers | list(any) | [] | Additional container definitions appended to the task. |
auth_token_secret_arn | string | null | Secrets Manager ARN for NUKEUI_AUTH_TOKEN. Null disables authentication. |
target_account_role_arns | list(string) | [] | IAM role ARNs in target accounts the task role may assume. |
enable_s3files | bool | true | Mount an S3 Files filesystem at /data. False = ephemeral storage. |
create_alb | bool | false | Create an Application Load Balancer in front of the service. |
alb_subnet_ids | list(string) | null | Public subnet IDs for the ALB. Defaults to subnet_ids. |
certificate_arn | string | null | ACM certificate ARN for HTTPS. When set, HTTP redirects to HTTPS (301). |
tags | map(string) | {} | Tags applied to all resources. |
Outputs
| Output | Description |
|---|---|
service_name | ECS service name. |
cluster_arn | ECS cluster ARN (created or provided). |
task_definition_arn | Latest active task definition ARN. |
task_role_arn | IAM role ARN assumed by the running task. Add to target account trust policies. |
execution_role_arn | ECS task execution role ARN. |
s3files_file_system_arn | S3 Files filesystem ARN mounted at /data. Null if enable_s3files = false. |
s3_bucket_name | S3 bucket backing the S3 Files filesystem. |
log_group_name | CloudWatch log group name (/ecs/<name>), 30-day retention. |
security_group_id | Security group attached to the ECS task. |
alb_dns_name | ALB DNS name. Null if create_alb = false. |
alb_arn | ALB ARN. Null if create_alb = false. |
target_account_trust_policy_snippet | JSON snippet to paste into target account IAM role trust policies. |
AWS architecture
Target account trust policy
Each target account role must trust the task role. Use the target_account_trust_policy_snippet output or add this statement to the role's trust policy:
{
  "Effect": "Allow",
  "Principal": {
    "AWS": "<value of task_role_arn output>"
  },
  "Action": "sts:AssumeRole"
}AdministratorAccess — aws-nuke must be able to delete any resource type. Never attach this role to anything other than the Reclaim task role.
SQLite on S3 — Persistence Architecture
Reclaim uses SQLite as its only database. On ECS Fargate, the SQLite file lives on an AWS S3 Files filesystem — a managed NFS service backed by an S3 bucket. This gives durable, cross-restart persistence without running a separate database service.
Why SQLite?
SQLite requires zero external runtime dependencies. There is no database server to provision, patch, or pay for. The expected write throughput is low: run events are append-only, configs are updated infrequently, and there is typically one writer at a time (a single ECS task). modernc.org/sqlite is a pure-Go port — no CGO, no shared libraries, fully static binary.
What is AWS S3 Files?
AWS S3 Files is a managed NFS-compatible filesystem service that stores data in an S3 bucket. It exposes an NFS v4 endpoint that ECS tasks can mount as a volume — similar to EFS, but backed by S3 object storage. The Terraform module creates:
- An S3 bucket (
<name>-data-<account-id>) with versioning, AES256 SSE, and public access blocked. - An
aws_s3files_file_systemresource pointing at the bucket. - One
aws_s3files_mount_targetper private subnet, so the ECS task can reach the NFS endpoint from any AZ.
How the mount works in ECS
The task definition declares a volume of type s3files_volume_configuration and mounts it at /data inside the reclaim container:
# From the task definition in main.tf
volume {
  name = "reclaim-data"
  s3files_volume_configuration {
    file_system_arn = aws_s3files_file_system.data[0].arn
    root_directory  = "/"
  }
}

# Container mount point
mountPoints = [
  { sourceVolume = "reclaim-data", containerPath = "/data", readOnly = false }
]
When the ECS task starts, the ECS agent mounts the S3 Files filesystem at /data before the application container starts. The application then opens (or creates) /data/nukeui.db (or the path set by NUKEUI_DB_PATH) as a normal local file. SQLite has no knowledge that the file lives on a network filesystem.
Startup write probe
Because S3 Files mounts can take a few seconds to become ready, the application probes the directory with an actual write before opening the database:
# From internal/store/db.go — waitForMount()
# Retries writing a probe file every 500ms for up to 5 seconds.
# Fails fast with a clear error if the mount is not writable.
This prevents SQLite from opening a read-only or not-yet-mounted path and producing a confusing error.
Persistence across restarts
Because the SQLite file lives in S3 (via the S3 Files mount), it survives:
- Container crashes and ECS task replacements
- ECS service deployments (new task revision)
- Fargate host replacements
A new task simply mounts the same S3 Files filesystem and finds the existing database file.
IAM permissions for the task role
The task role is granted the following S3 permissions on the data bucket (via the <name>-s3files IAM role, which the S3 Files service assumes on behalf of the task):
| Action | Purpose |
|---|---|
s3:GetObject | Read SQLite pages from S3. |
s3:PutObject | Write SQLite pages to S3. |
s3:DeleteObject | Remove obsolete SQLite pages (e.g. after WAL checkpoint). |
s3:ListBucket | List objects for filesystem directory operations. |
s3:GetBucketLocation | Resolve the bucket region. |
s3:AbortMultipartUpload | Clean up failed multipart uploads. |
s3:ListMultipartUploadParts | Resume or abort multipart uploads. |
SQLite journal mode
The database is opened with _journal_mode=DELETE (the default rollback journal, not WAL). WAL mode uses shared-memory files (-shm) and a write-ahead log (-wal) that rely on POSIX advisory locks — these do not work correctly over NFS/FUSE-style mounts. DELETE journal mode uses only the main database file and a temporary -journal file, which is safe over S3 Files NFS.
Additional connection settings applied at open time:
_foreign_keys=on       # enforce referential integrity
_journal_mode=DELETE   # NFS-safe rollback journal (not WAL)
_busy_timeout=5000     # wait up to 5s on a locked database
_temp_store=memory     # keep temp tables in memory, not on the NFS mount
_cache_size=-8000      # 8 MB page cache in memory
The connection pool is set to max 1 open connection (db.SetMaxOpenConns(1)). This prevents concurrent writers from racing on the NFS lock and ensures SQLite's single-writer guarantee is respected at the application level.
Limitations and trade-offs
desired_count = 1 in the module.
- Latency: Every SQLite page read/write goes over NFS to S3. For Reclaim's workload (infrequent writes, small reads) this is imperceptible, but it would not suit a high-throughput OLTP workload.
- No WAL mode: WAL mode's concurrent reader/writer model is not available. All reads and writes are serialised through the single connection.
- S3 versioning: The bucket has versioning enabled, providing a point-in-time recovery mechanism for the SQLite file at the S3 object level.
- Cost: S3 Files charges per GB-month stored and per NFS operation. For a small SQLite database this is negligible.
Architecture diagram
Deployment Guide
End-to-end steps to deploy Reclaim to AWS ECS Fargate from scratch.
Prerequisites
- Terraform >= 1.5 (or OpenTofu >= 1.6)
- AWS CLI configured with credentials for the controller account
- An ACM certificate in the deployment region (for HTTPS)
- A VPC with public and private subnets (the example
infra/deployments/prod/main.tfcreates one)
Step 1 — Configure Terraform variables
Create a terraform.tfvars file in your deployment directory:
aws_region      = "eu-west-1"
name            = "reclaim"
vpc_cidr        = "10.0.0.0/16"
certificate_arn = "arn:aws:acm:eu-west-1:123456789012:certificate/abc-123"

auth_token_secret_arn = "arn:aws:secretsmanager:eu-west-1:123456789012:secret/reclaim/auth-token-XXXXXX"

target_account_role_arns = [
  "arn:aws:iam::111111111111:role/NukeTargetRole",
]

allowed_cidr_blocks = ["203.0.113.0/24"]  # your office/VPN CIDR

tags = {
  Project = "reclaim"
  Owner   = "platform-team"
}
Step 2 — Initialise and apply Terraform
Run the commands from your Terraform deployment directory. For example, if your deployment configuration is in infra/deployments/prod, use:
cd infra/deployments/prod
terraform init
terraform plan -out=tfplan
terraform apply tfplan
Or replace infra/deployments/prod with the path to your chosen deployment directory.
Terraform will create (in order): VPC + subnets + NAT gateways, S3 bucket + S3 Files filesystem, IAM roles, ECS cluster + task definition + service, ALB + listeners + target group, CloudWatch log group.
The apply typically takes 3–5 minutes. The ECS service will show as RUNNING once the health check passes.
Step 3 — Add trust policies to target accounts
Get the task role ARN from Terraform output:
terraform output task_role_arn
# arn:aws:iam::123456789012:role/reclaim-ecs-task
In each target account, add this statement to the NukeTargetRole trust policy:
{
  "Effect": "Allow",
  "Principal": {
    "AWS": "arn:aws:iam::123456789012:role/reclaim-ecs-task"
  },
  "Action": "sts:AssumeRole"
}
Or use the pre-formatted snippet from Terraform:
terraform output -raw target_account_trust_policy_snippetStep 4 — Verify the deployment
# Get the ALB DNS name
terraform output alb_dns_name
# reclaim-1234567890.eu-west-1.elb.amazonaws.com

# Health check (no auth required)
curl https://reclaim.yourdomain.com/api/v1/health
# {"status":"ok","version":"dev"}

# Check ECS task logs
aws logs tail /ecs/reclaim --follow --region eu-west-1
Tearing down
force_destroy = false. Terraform will refuse to destroy it while it contains objects. Export your data before destroying, or manually empty the bucket first.
# Empty the data bucket first (replace with actual bucket name)
aws s3 rm s3://reclaim-data-123456789012 --recursive

# Then destroy all infrastructure
terraform destroy